Last month, Romain and I once again braved Bay Area rush hour traffic and gave a couple of talks at the SF Android user group. Those talks were recorded and are now posted online:
An Introduction to Ice Cream Sandwich (Android 4.0)
This talk overviews some of the user and developer features of the new Android 4.0 release, through slides and demos. We also got side-swiped by a massive Q&A phase in the middle; always interesting to see what's on peoples's minds (and maybe even answer those questions sometimes).
Sticky GUIs
This talk discusses some principles, approaches, and techniques in graphics, animation, layouts, and performance that may help you create better and more usable UI applications.
(The ICS recording has interesting audio. It reminds me of early efforts at "stereo" with the Chet instrument coming out of your left speaker and the Romain instrument coming out of your right speaker. But the recordings are very good otherwise. And maybe it's better this way - you can just mute one of the speakers and mute the speaker you're tired of).
Wednesday, December 14, 2011
Tuesday, November 22, 2011
#DevoxxBlog: Of Slides and Such
I spent last week at Devoxx, giving several talks with Romain Guy about Android (graphics, GUIs, performance, the latest developer features ... the usual). Now that I've recovered from a total system collapse over the weekend (apparently the body does insist on getting a little sleep now and then), I thought I'd post some thoughts and also the slides from our presentations.
Thoughts
Devoxx is my favorite developer conference. It is a perfect mix of highly technical (focused on developers, not business/marketing/PR), inexpensive (at 350-700 Euros, it's quite a deal for 2-5 days of full technical content of this caliber, even at the current exchange rate of 1 Euro == $97,000.02), and personal (it's a relatively small, single venue, so you're all together there in the talks, in the lobby, in the hallways, and on the show floor). And it's in an interesting venue (Antwerp, while not balmy in November, is a far more interesting location to return to than, say, San Jose). Oh, and the beer is quite nice.
The conference is well run, the talks are professionally recorded and viewable on the excellent parleys.com website, and the beer is tasty. Parleys, and its free subscription for conference attendees, is particularly crucial since the comfortable theater seating guarantees that you'll have to catch up on at least some of the talks later.
Content
Romain and I gave several talks this year, not all of which have accompanying slides:
University: Android Awesomeness
This vaguely-titled 3-hour talk on Monday was in two parts. In the first half, Romain and I did a very quick introduction to the Android 4.0 release, then Philip Milne (another engineer on the Android framework team) followed up with a deep-dive into the GridLayout class that is new in the 4.0 release. The second half was more interactive, as we showed how we use the tools that ship with the SDK to debug performance, memory, and UI issues.
You can download the slides for this talk here: Part 1 and Part 2.
Lab: Just Desserts: Developing with the Latest Features from Honeycomb and Ice Cream Sandwich
This was a 3-hour lab on Tuesday morning in which we showed how to use some of the new features like fragments, TextureView, layers, and animations. No slides for this one; you had to be there. (I may post code projects later once I whip the code into presentable shape).
Session: Graphics Goodies
Wednesday's talk was an updated version of the Android Accelerated Rendering talk we did at Google IO.
Here are the slides.
Session: Sticky GUIs
This presentation on Thursday was a collection of techniques and principles for creating GUI applications that will make your users stick: graphics, performance, animations, GUIs; they're all important.
Here are the slides.
Android Awesomeness, Graphics Goodies, and Sticky GUIs were all recorded and will be available soon on the parleys.com website. You may get more out of the full presentations than from just the slides. In fact, I hope you do, because otherwise I don't know why we traveled that far to present them.
Saturday, November 5, 2011
Devoxx: Then and Now
I'm starting to prepare presentations for the ~8 hours of talks that Romain and I are giving at Devoxx in a couple of weeks. "Preparing" generally entails mostly worrying, followed by a mad rush of writing slides and code at night, on the long flight, after beers, between talks, and sometimes during the talks. It's a busy time of year.
I realized that the organizers of Devoxx had recently released all of the recorded talks from last year into the wild (read: they're free on parleys.com), so it seemed worth linking to them in case anyone wanted to see what we had to say last time around.
I'll give a plug for the conference and the Parleys site here. If there were an ad banner, it'd go here. Not because I'm paid (I would make a poor ad salesman, apparently), but because I think that both the conference and the parleys site rock. The organizers do a great job of putting it all together, and the recordings and presentation of the talks on parleys.com is the best I've seen by far of any conferences I've spoken at.
Parleys is a subscription site; after the annual conference, you can join for the year (for a fee of 79 Euros) to watch all talks given at the conference. During that year, the talks are made freely available, one by one, then at the end they are all free. That year has passed, so the 2010 talks are all available now for free. If you enjoy them, consider joining parleys next time around to see them earlier. Or better yet, join us in balmy Antwerp, where the beer is good and so are the fries.
Dive into Android, Part 1
Romain talks about layout. This talk includes live-coding a custom layout, which is a good lesson in how to do it yourself (although you probably don't need to do it on stage in front of the cameras to make it work the way you want).
Dive into Android, Part 2
I talk about custom graphics. This is kind of a Filthy Rich Client talk, but more focused on the core principles and approaches of doing custom graphics in Android applications. nothing over-the-top filthy, just good stuff to know about Android GUI development.
Android Graphics and Animations
We cover lots of architectural details about the Android platform, including the view hierarchy, classes used in custom graphics, and pre-3.0 animations (remember: this talk was given before Android 3.0 (Honeycomb) was released).
Android UI Development: Tips, Tricks, & Techniques
This talk consists of a smattering of tips that will help you write efficient Android applications. We discuss the various tools that you should use, techniques for avoiding unnecessary garbage creation, and various performance tips.
Flex 4 FunThis is my swan song for the platform that I worked on prior to Android, and for my Flex 4 Fun book that was published last year. I cover various things from the book, including graphics objects, filters, states and transitions, component skinning, and (of course) animation effects (the area I worked on for Flex 4). Lots of demos and code.
I realized that the organizers of Devoxx had recently released all of the recorded talks from last year into the wild (read: they're free on parleys.com), so it seemed worth linking to them in case anyone wanted to see what we had to say last time around.
I'll give a plug for the conference and the Parleys site here. If there were an ad banner, it'd go here. Not because I'm paid (I would make a poor ad salesman, apparently), but because I think that both the conference and the parleys site rock. The organizers do a great job of putting it all together, and the recordings and presentation of the talks on parleys.com is the best I've seen by far of any conferences I've spoken at.
 |
| Yes, that young man on the pedestal is throwing a hand. It's an Antwerp thing. |
Dive into Android, Part 1
Romain talks about layout. This talk includes live-coding a custom layout, which is a good lesson in how to do it yourself (although you probably don't need to do it on stage in front of the cameras to make it work the way you want).
Dive into Android, Part 2
I talk about custom graphics. This is kind of a Filthy Rich Client talk, but more focused on the core principles and approaches of doing custom graphics in Android applications. nothing over-the-top filthy, just good stuff to know about Android GUI development.
Android Graphics and Animations
We cover lots of architectural details about the Android platform, including the view hierarchy, classes used in custom graphics, and pre-3.0 animations (remember: this talk was given before Android 3.0 (Honeycomb) was released).
Android UI Development: Tips, Tricks, & Techniques
This talk consists of a smattering of tips that will help you write efficient Android applications. We discuss the various tools that you should use, techniques for avoiding unnecessary garbage creation, and various performance tips.
Flex 4 FunThis is my swan song for the platform that I worked on prior to Android, and for my Flex 4 Fun book that was published last year. I cover various things from the book, including graphics objects, filters, states and transitions, component skinning, and (of course) animation effects (the area I worked on for Flex 4). Lots of demos and code.
Tuesday, November 1, 2011
Android 4.0 Graphics and Animation
Romain and I wrote this article for the Android developer blog about
graphics and animation features (what else?) in the latest Android
release.
Enjoy...
http://android-developers.blogspot.com/2011/11/android-40-graphics-and-animations.html
Enjoy...
http://android-developers.blogspot.com/2011/11/android-40-graphics-and-animations.html
Friday, September 16, 2011
Old Views Don't Die; They Just Fade Away
One of the app developers here on Android asked me about the best way to animate adding and removing items from a UI. Specifically, he wanted to fade items in and out as they became visible/invisible.
So I wrote up a sample activity that used ViewPropertyAnimator, showing how to set the visibility at the right time (making it visible before fading it in, listening for the onAnimationEnd() to set it invisible after fading it out). Pretty straightforward, but if you haven't played around a lot with the new animation classes yet (WHY HAVEN'T YOU?!?!), it's probably not obvious:
To make it invisible:
I sent the sample application along to the developer.
Then I thought I'd add to that sample and show how to also add/remove views, or set them to View.GONE as well as View.INVISIBLE.
I sent that updated sample to the developer as well.
Then I thought I might as well show how you'd do the same thing with ObjectAnimator. It's a little more code than ViewPropertyAnimator, but still pretty straightforward. For example, fading the object out and making it invisible looks like this:
I sent this further updated sample to the developer.
Then I thought I'd poke at a utility class that's been on my mind for a while. We have all of these new animation capabilities as of the Honeycomb release, but I'd still like it to be simpler to run these kinds of animations, especially ones that involve several actions like this: fade this view out, then remove it. So I wrote up a Fade class that has utility methods in it for fading/adding/removing/etc. I enhanced the sample to use the new Fade utilities. Now making a view invisible is just one step:
I sent this latest version of the sample to the developer. He was getting pretty tired of hearing from me by this time.
Then I tweaked the Fade class to have a duration property.
I was going to send this final (ha!) update to the developer, but I didn't want him to call security on me. I think he got what he needed the first time around. So rather than continue to bury him in yet more ways to accomplish this simple task, I thought I'd publish it here.
Check out the sample code for FaderActivity, which shows all of these things: ViewPropertyAnimator, ObjectAnimator, and this new Fade utility class. I hope that something like the Fade class and other higher-level animation classes will make it into the SDK eventually, but in the meantime, Fade should simplify fading tasks.
There are a couple of things to note about fading animations. One thing is that there is an abrupt 'pop' when an item is removed from or added to a layout that is affected by that change. For example, the LinearLayout used in the example expands or contracts when the first button is removed or added or when the last button is set to VISIBLE or GONE (although you can't see that change since it's the last item in that layout). There's nothing to be done about this problem right now, although you might play with the LayoutTransition class available in 3.0, which animates the layout changes as well.
It's also worth noting that the Fade class is great at fading things out from their current alpha and then back to an alpha value of 1 (fully opaque). It does not compensate for in-between alpha values that your views might want to persist between fades. That logic could be added, but there's some tedious logic around knowing when an in-between value is coming from the view itself vs. some other fade animation that happens to be running when you start the new one (for example, you fade an item out and then, halfway through, you fade it back in). The Fade class is great for the common case where views are typically just opaque (alpha == 1). But it seemed worth mentioning.
You can grab a zipped version of the Eclipse project with the source for the example activity and the utility Fade class here.
Enjoy.
So I wrote up a sample activity that used ViewPropertyAnimator, showing how to set the visibility at the right time (making it visible before fading it in, listening for the onAnimationEnd() to set it invisible after fading it out). Pretty straightforward, but if you haven't played around a lot with the new animation classes yet (WHY HAVEN'T YOU?!?!), it's probably not obvious:
To make it invisible:
invisibleButton.animate().alpha(0f).setListener(new AnimatorListenerAdapter() {
                    public void onAnimationEnd(Animator animation) {
                        invisibleButton.setVisibility(View.INVISIBLE);
                        invisibleButton.setAlpha(1f);
                        invisibleButton.animate().setListener(null);
                    }
                });
To make it visible again:invisibleButton.setAlpha(0);
invisibleButton.setVisibility(View.VISIBLE);
invisibleButton.animate().alpha(1);
I sent the sample application along to the developer.
Then I thought I'd add to that sample and show how to also add/remove views, or set them to View.GONE as well as View.INVISIBLE.
I sent that updated sample to the developer as well.
Then I thought I might as well show how you'd do the same thing with ObjectAnimator. It's a little more code than ViewPropertyAnimator, but still pretty straightforward. For example, fading the object out and making it invisible looks like this:
                ObjectAnimator anim = ObjectAnimator.ofFloat(invisibleButton1, "alpha",0);
                anim.addListener(new AnimatorListenerAdapter() {
                    public void onAnimationEnd(Animator animation) {
                        invisibleButton1.setAlpha(1);
                        invisibleButton1.setVisibility(View.INVISIBLE);
                    }
                });
                anim.start();
I sent this further updated sample to the developer.
Then I thought I'd poke at a utility class that's been on my mind for a while. We have all of these new animation capabilities as of the Honeycomb release, but I'd still like it to be simpler to run these kinds of animations, especially ones that involve several actions like this: fade this view out, then remove it. So I wrote up a Fade class that has utility methods in it for fading/adding/removing/etc. I enhanced the sample to use the new Fade utilities. Now making a view invisible is just one step:
fade.hide(invisibleButton2, View.INVISIBLE);Similarly, making that view visible again is a single call:
fade.show(invisibleButton2);
I sent this latest version of the sample to the developer. He was getting pretty tired of hearing from me by this time.
Then I tweaked the Fade class to have a duration property.
I was going to send this final (ha!) update to the developer, but I didn't want him to call security on me. I think he got what he needed the first time around. So rather than continue to bury him in yet more ways to accomplish this simple task, I thought I'd publish it here.
Check out the sample code for FaderActivity, which shows all of these things: ViewPropertyAnimator, ObjectAnimator, and this new Fade utility class. I hope that something like the Fade class and other higher-level animation classes will make it into the SDK eventually, but in the meantime, Fade should simplify fading tasks.
There are a couple of things to note about fading animations. One thing is that there is an abrupt 'pop' when an item is removed from or added to a layout that is affected by that change. For example, the LinearLayout used in the example expands or contracts when the first button is removed or added or when the last button is set to VISIBLE or GONE (although you can't see that change since it's the last item in that layout). There's nothing to be done about this problem right now, although you might play with the LayoutTransition class available in 3.0, which animates the layout changes as well.
It's also worth noting that the Fade class is great at fading things out from their current alpha and then back to an alpha value of 1 (fully opaque). It does not compensate for in-between alpha values that your views might want to persist between fades. That logic could be added, but there's some tedious logic around knowing when an in-between value is coming from the view itself vs. some other fade animation that happens to be running when you start the new one (for example, you fade an item out and then, halfway through, you fade it back in). The Fade class is great for the common case where views are typically just opaque (alpha == 1). But it seemed worth mentioning.
You can grab a zipped version of the Eclipse project with the source for the example activity and the utility Fade class here.
Enjoy.
Wednesday, August 24, 2011
The Mysterious Behavior of fillBefore, fillAfter, and fillEnabled
A bug was filed on android.com recently that had me poring through the code and docs to understand three boolean flags in the old Animation class: fillBefore, fillAfter, and fillEnabled. On the surface, these properties don't seem that difficult to understand; they control how animations behave before and after they run. But between some complicated interactions of the properties and some, er, inaccuracies in the reference docs, it turned out to be somewhat tricky to understand how they work and how they're supposed to work. Once I got through that exercise (including fixing the docs - look for those fixes in a future release), I thought it might be helpful to explain how these flags really work.
First, let's cover the behavior of fillBefore and fillAfter. We'll get to fillEnabled and it's, um, special behavior after that.
Before and After
fillBefore and fillAfter are pretty simple, conceptually; they define how an animation behaves before and after it runs. fillBefore controls whether the initial value of the animation is applied before its start time and fillAfter controls whether the animation's ending value persists after it ends. There are a couple of important nuances to understand, however.
- start time: The starting time of an animation, for the purposes of
fillBefore, is not the time when you callstartAnimation()on a View. Rather, it's the time that the animation will actually start running. These two times are the same if there is nostartOffsetset on the animation, but if you want to delay your animation, you might set astartOffsetvalue to achieve that delay.fillBeforecontrols whether the animation will use the initial value of the animation during that startOffset phase. - AnimationSet: If you want to control the fill behavior of an animation that is inside an AnimationSet, it is certainly possible to do this. But if you want to control what happens outside the runtime of that AnimationSet, then you need to set the fill behavior on the set itself. For example, the
fillAfterflag controls whether a ScaleAnimation's end value is used after it ends. But if the animation you set on your View is actually an AnimationSet containing that inner ScaleAnimation, then you need to setfillAfteron the AnimationSet if you want the value to persist after the AnimationSet ends. You can think of the fill behavior flags as having scope, which is either global (when not contained in an AnimationSet) or local to the AnimationSet in which their contained. Or you can just play with them enough to get the hang of it, like I did. It's also worth noting, as stated in the docs (correctly this time) that if you set the value offillBeforeorfillAfterthese values will override those in the child animations of the set.
The default values for these flags are true for fillBefore and false for fillAfter. So by default, animations will set their initial value immediately when the animation starts (regardless of startOffset), but will not persist those values after they end.
So that's all there is to those flags: you set or unset them according to whether you want the animation values to be used outside of when the animation is actually running. Well, sort of...
The Enabler
Here's where the other flag, fillEnabled, comes in. This flag controls when the other flags are actually taken into account. Or that's what some of the docs would have you believe. In actual fact, this flag controls only the behavior of fillBefore, and essentially leaves fillAfter to its own devices.
Here's how the value of fillEnabled works:
- false: If
fillEnabledis false (which it is by default), then the value offillBeforewill be ignored. That's right, you can set or unset it all you want, but it will ignore your wishes and will essentially assume thatfillBeforeis true. - true: When
fillEnabledis true, the value offillBeforewill be taken into account to determine whether to apply the animation before it begins. The value offillAfter, as I said earlier, will be used as-is, regardless of the value offillEnabled.
All of this means that the only way to get an animation to not persist its starting value before it actually starts running is to set both fillEnabled to true and fillBefore to false. Any other combination will result in the animation being applied before its starting time. Meanwhile, the value of fillAfter is applied directly, regardless of the value of fillEnabled. I believe it is this asymmetric behavior (coupled with an unfortunately generically named "fillEnabled" property and some, well, bugs in the docs) that made these three variables particularly difficult for some people to understand. Some people like me.
At this point, you might be asking yourself why these variables were created and defined in this way. All I can say is, welcome to the wonderful world of API development, where behavior needs to evolve while compatibility is preserved. In any case, I hope this explanation helps those who needed it.
p.s. For those starting to use the new animation system introduced in Android 3.0, you can forget about all of this; there is no fill behavior (before, after, or enabled) for Animator-based animations.
Thursday, August 4, 2011
DroidFlakes: An Android Animation Demo
Here's a simple app that I wrote recently to see how background processing affects frame rate. There's nothing too complicated going on in the app, but it seemed worth publishing to show how to do various things in Android, such as:
- Using a single ValueAnimator (3.0+ API) to animate several objects independently
- Manipulating the transform of Canvas to move/rotate objects
- Using the GPU to provide faster rendering (3.0+ capability)
- Tracking the current frames per second performance
Here's the code (a zipped Eclipse project for the app). You should be able to build/run it for any 3.0+ target device.
Note: this is not the Renderscript app that I showed in a recent user group talk. That other app is based on this one, but uses Renderscript to animate and draw the droidflakes. This version just uses the standard Canvas API to draw bitmaps. I'll post the Renderscript version soon.
Wednesday, June 29, 2011
Video: Android UI: Tips, Tricks, and Techniques
Romain and I gave several talks at the excellent Devoxx conference in balmy Antwerp last November. The video of one of these talks, Android UI Development: Tips, Tricks and Techniques, has just been published for free on the Parleys.com site. All of the conference talks have been available for months to subscribers (79 Euros), but for those who haven't gotten around to registering quite yet, the talks are published incrementally for free throughout the year, and our UI Tips talk is now available.
This talk covers a mix of topics, from "Garbage Zero" (techniques to avoid producing garbage when it matters) to an exploration of various tools and performance techniques that we use to produce better Android code.
Check out the video here: Android UI Development: Tips, Tricks and Techniques.
Thursday, June 23, 2011
Android Rendering Options
I've given some talks about Android graphics recently, and the same questions keep coming up:
- What is Renderscript appropriate for?
- Is it a replacement for OpenGL rendering?
- How do I access Renderscript from NDK code?
- When do I choose between the different rendering options?
- Can I have a free tablet?
It seemed to me that a brief article might help. In particular, I wanted to write something that lays out the various rendering options that Android provides and describes how we envision developers using them (and how we use them ourselves in the applications that we ship) so that you might better understand how and when to use them in your applications. Of course you're not bound to what we think; if you come up with new ways to use what the platform provides, all the better. But we can at least provide a little guidance to help you navigate the myriad of options. Hopefully this article will help answer the questions above. Except for the last question about the free tablet - I can't help you there.
First, I should explain what I mean by rendering, for everyone reading this that's not a graphics geek. "Rendering" is a synonym for drawing. Rendering is also defined as the process of turning an animal carcass into fat and other component pieces... but that's not what I'm talking about here. This article is about is all of the ways, in the Android platform, of drawing things onto the display. For example, you might have a drawing application, or a photo album, or a game, or a reading program, or anything else that needs to draw its content to the screen. If you're just using the SDK components (ImageView, Button, TextView, and so on), then we handle the rendering of these components internally. But if you have custom components that draw their own graphical elements, or if you're writing a fullscreen game that draws everything itself, then you need to know how to draw those items onto the device screen so that the user can see and interact with them.
There are two options for writing Android applications, each with their own ways of rendering graphics. I'll cover each of these in the following sections.
- SDK
- NDK
The Android SDK
The SDK is the typical, default approach for most GUI applications. You write your application using the Java programming language and the libraries that the SDK provides. Most of the graphics on the screen are drawn by the framework for the standard View objects such as Button, TextView, ListView, and so on. If you create custom Views or have customized rendering that you want to do for your application, then you need to know about the rendering options available to SDK applications. There are basically three options:
- The Canvas API
- Renderscript
- OpenGL wrappers
The Canvas API
What I mean by "Canvas API" is the standard rendering for a typical SDK application that uses View objects (standard and custom) and performs and rendering by calling the various methods in the Canvas class. The rendering process of the Android view hierarchy consists of calls to each View's onDraw() method. This method takes a single parameter, Canvas, which is the object used by the view to draw its content. For example, a Button might tell its background Drawable to draw itself into the Canvas and then draw its label with a call to Canvas.drawText().
If you have a custom View, in which you implement the onDraw() method and draw your own graphic elements, then you would typically call methods in the Canvas object passed in to the onDraw() method. For example, you might draw lines with Canvas.drawLine() and circles with Canvas.drawCircle().
This approach to rendering is typical for most GUI applications, and is fine for most purposes when you just need standard GUI components and graphics and for which the performance of your application is not an issue. With the GPU acceleration that we added in Android 3.0, the performance for the Canvas API is even better than it used to be. As discussed in the article Android 3.0 Hardware Acceleration, all rendering done by the SDK now happens via OpenGL calls to the GPU. This level of hardware acceleration for standard as well as custom views and graphics can provide excellent performance and allows for parallelism by offloading rendering work from the CPU onto the GPU.
But sometimes you may want to go beyond what the Canvas API provides, either in terms of the graphics functionality you need or the performance that your particular situation requires. For example, the Canvas API does not provide complete 3D rendering capabilities. In these situations, you might want to look beyond the Canvas API to the other options available in the SDK.
Renderscript
The Renderscript API was introduced in Android 3.0. Renderscript was actually in use in an earlier form long before this release; the Live Wallpapers that shipped with earlier releases were written using Renderscript. But Android 3.0 introduced the first public form of the API and the runtime library. Describing what Renderscript is and how to use it is beyond the scope of this article. Instead, I'll just refer you to Jason Sams's introductory articles, Introducing Renderscript and Renderscript Part 2. Very briefly, Renderscript is a language, API, and runtime library that you can use to achieve high performance rendering and computation for Android applications.
An application using Renderscript is an SDK application, using any of the SDK APIs and facilities provided at that level, with addition pieces of the application written using the Renderscript language. These scripts are initialized from Dalvik code. The scripts automatically provide glue code that wraps fields at the Renderscript level, so that SDK code can set values in Renderscript code by calling simple methods. Renderscript has a reference to a drawing surface that it renders to in a thread that is separate from the UI toolkit thread. It handles its own rendering and the timing of when that rendering happens.
One of the things that makes Renderscript compelling is that it can determine, at runtime, the best way to achieve high performance for a particular operation. For example, it might send graphics operations down to the GPU, or it might parcel out independent computations to separate cores in a multi-core device. All of this is transparent to the application; it simply starts the script, sets the values, and lets it go.
An important use case for Renderscript arises for SDK applications that need functionality or performance that cannot be had through the SDK directly. For example, your application may need to perform 3D graphics operations or heavy computation that takes too much time at the SDK level. You might consider taking these portions of your application and farming them out to Renderscript to do the work there instead.
An important consequence of the Renderscript approach using SDK and runtime-compiled code is that Renderscript applications are fully portable between devices. That is, you only need to compile your application once, not per-architecture (as you must do with the NDK). This single apk is then runnable on any device that supports the SDK level that you compiled for (3.0 and above, since 3.0 is the first Android release to support Renderscript).
Examples of Renderscript in Android 3.0 include the Live Wallpapers, the video wall view in the YouTube application, and the Books application (including that beautiful page-turn effect). Other examples can be found in the SDK samples; you should check these out to understand how to write Renderscript as well as how to initialize and interact with the scripts from SDK applications.
OpenGL Wrapper Functions
Android also provides wrappers for OpenGL APIs at the SDK level. That is, you can write an application using the SDK, with full access to usual SDK APIs and functionality, and still use OpenGL ES 1.x and OpenGL ES 2.0 APIs, by calling the wrapper functions in GLES10 or GLES20 classes. These wrappers call the underlying OpenGL APIs at the native level for those versions of OpenGL ES.
For casually exploring or using OpenGL, this may be a reasonable option. But while this approach works, it's not a recommended practice as a general approach for complex scenes that require high-performance graphics. For one thing, it is difficult to achieve high performance levels equivalent to native access to OpenGL due to the overhead of calling down from the SDK to the native level for every OpenGL call.
The Music application that shipped with Android 3.0 used this approach. The application was an SDK application which needed some simple 3D graphics operations, such as the carousel view of albums. The main reason that it uses the SDK/OpenGL approach is because it is an unbundled application (not dependent upon a particular release of the SDK) and needed to work on releases back to 2.2. It therefore used APIs that were available on those previous releases.
NDK
The NDK exists to provide an easy porting layer for existing applications written in native code, or which use native libraries. Porting might be more easily and quickly accomplished by using the NDK than by converting existing code to the language and APIs used by the SDK.
The NDK does not provide the rich GUI toolkit of the Android platform at the native level, so developers do not have access to the View objects, or the events, or the rest of the infrastructure that is provided in the SDK APIs. But there is a graphics environment at the NDK level that is sufficient for some specific purposes. In particular, game developers that simply want a fullscreen game experience can find what they need with OpenGL. This API provides low-level graphics functionality that lets applications display 2D and 3D graphics using the GPU for maximum graphics performance.
One important restriction of the NDK to keep in mind is that it compiles applications to specific CPU architectures. This means that if you only build your application for one specific chip, then the application will not work on Android devices that do not have that chip architecture. This is particularly important in the broad and growing Android ecosystem where new devices are coming out all the time. You probably want your application to work as well on new chips as it did on the ones you used to develop the application. So while the NDK OpenGL solution provides a reasonable route to fast graphics performance, it does so at the cost of the portability that other solutions offer.
One of the questions that came up about Renderscript when I talked to developers was how to access it from the NDK. This is not currently possible. Renderscript is specifically created to be a companion to SDK applications. We envision users of Renderscript as SDK applications that use Renderscript for their high-performance graphics or computation needs. These applications might be primarily SDK applications, with GUIs and interaction and most other facilities provided by the SDK APIs and small but important pieces of functionality provided by Renderscript, such as graphics effects that would otherwise not be possible or not perform as well. Or these applications might use Renderscript for most of what they do, just using the SDK to initialize the scripts and letting Renderscript take over from there.
And So...
I've tried to explain and categorize the different rendering options that we provide in the Android platform. What may seem confusing at first, because of the potential overlap, is actually simple once you understand how these libraries differ from each other in their purpose, their use, and their advantages. Here's one last brief take at a breakdown of when you might consider the various options:
- SDK Canvas API: If you're writing a normal GUI application, using the SDK and the Canvas API is probably the most sensible option. If you need custom 2D graphics, there is plenty of power and reasonable performance in the Canvas API.
- SDK Renderscript: If you want a fully portable, SDK application with access to the power, speed, and functionality of the Renderscript library and underlying GPU and multi-core CPU architectures, then it's worth exploring this new feature of Android.
- SDK OpenGL Wrappers: If you are writing an SDK application and want to sprinkle in some 3D effects with OpenGL, you could see whether the OpenGL wrapper functions suit your needs.
- NDK OpenGL: If you are porting your application from a different platform or existing native code and are looking for the fastest way to get it up and running on Android, then using the NDK with OpenGL is worth considering.
Whatever your rendering need, Android has something for you. So keep those cool graphics applications coming! (Sorry I still can't help you with the free tablet, though. There were tablets given away at Google I/O this year, so you could get one of those if you can travel back in time. I think there's an app for that. It probably uses Renderscript.)
Wednesday, June 1, 2011
Introducing ViewPropertyAnimator
The property animation capabilities that are in Android 3.0 (described in the article Animation in Honeycomb) represent a good building block for powerful animation capabilities in the platform. But we're not stopping there. One minor addition to the platform was added in the 3.1 release, ViewPropertyAnimator. This class allows very easy and efficient one-liner animations of some of the new View properties like alpha, rotation, and scaleX/Y.
Check out the Introducing ViewPropertyAnimator article on the Android developer blog for more about this new API. In the meantime, enjoy this teaser trailer that shows the demo described in the article. The interesting part is the code (shown in the article, not here). And the soundtrack, of course: turn up your speakers.
Friday, May 13, 2011
IOU IO Slides and Videos
I had the chance to speak at Google I/O this week, giving two talks with Romain Guy, Honeycomb Highlights and Android Accelerated Rendering. The talks were fun, as were the conversations with the developers that came by our Android Office Hours. The conference was enjoyable and relaxing; I'm looking forward to my system recovering by sometime in June of 2012.
Google's pretty good at posting content online (surprise, surprise), and I/O is no exception. Our Honeycomb talk was available on YouTube as we were giving it (nothing like streaming live to the world to keep the nervous tension alive), and I hope to see the Rendering talk posted there soon. In the meantime, Romain provided links to the all of the video, slide, and demo resources for our talks; check out his blog for all of the details. And hopefully see you at some future I/O or other Android-related conference!
Wednesday, March 9, 2011
AnDevCon Slides
Here are the slides from our presentations at AnDevCon:
Android 3.0: Honeycomb and Get It. This presentation, with Romain Guy, was an overview of some of the highlights in the 3.0 release, for users and for developers.
Androidimation: Animation in Android. This presentation discussed how to use the animation APIs in Android, including the animation classes in the SDK before 3.0 and the new animation system in 3.0.
Enjoy.
Thursday, February 24, 2011
Recording Animations via HDMI
I've gotten some questions about how the video in my recent animation article as well as the video of Romain's excellent photo viewing app were created. I thought I'd spend a few words on it in case anyone else wants to do something similar.
I can tell you how I did it, but it'll cost you. About $200, in fact; that's how much I paid Amazon for the setup I used.
First, the reasons I wanted the device:
- Debugging animations is hard: So many of the issues I chase with animations are timing-dependent. So the typical approach of step-debugging doesn't work; as soon as you stop in the debugger, you've lost the stream of whatever is causing the issue.. Nor does it help to hack the code and add tracing output everywhere, because sometimes you can't easily access the code in question (although this is what I end up doing in many cases where I can change the code). Sometimes it helps to dramatically sloooooooow down the animations, so that you can see it unfold instead of trying not to blink and miss the action. But what would be really nice is to be able to catch the actual animation, at speed, and then be able to see it played back in slow motion. That's what HDMI recording gives me. I thought about getting a high-speed camera, but between the cost, the reliance on a lot of light for each frame, and the setup for any shot, that didn't seem like a great general solution.
- Screencasting: I've been wanting to do more blogging about Android development. In particular, I'd like to post some video tutorials, something like I did in a previous life. I find that forum to be very efficient, once I get into the groove. I can talk through a demo, show the demo, and show the code, and do so in far less time than it takes me to write an article, for example. But that means I'll need some way to screencast from the device that's running the animation code that I'll be talking about. I could take a video of me playing with the device, but it's more of a hassle to set it up, and the quality of the video just isn't as good.
The solution: an HDMI recorder. The Xoom device on which I recorded the video has an HDMI output port. So all I needed was a device on the other end of the HDMI cable to record that output stream. I picked up an Intensity Pro PCI Express card by Blackmagic, and that did the trick. I installed the card in my Mac Pro, installed the software that came with the device, and it was a simple matter of running the capture software to capture the actual video stream. You can also use other capture software, such as Adobe Premiere, but I found the software that came with the device sufficient for my needs. I did notice an occasional dropped frame (I had to set a setting in the software to not stop recording when there is a dropped frame), but overall it seems fine, at least for my use cases.
Here's a picture of the recorder's box (the card is in my machine and I didn't feel like taking it out). I like the sheer recursiveness here: it's a picture taken with the device of the recorder, uploaded via HDMI from the device to the recorder. I've put some other completely random objects on the shelf with it to give you a sense for its size (small).

I'm sure there are other solutions out there, but this setup works for me.
Animation in Honeycomb
I've posted an article, Animation in Honeycomb, on the Android Developers blog. The article gives an overview of the new property animation system in Android 3.0. Check it out.
And while you wait, here's the demo reel for the article. I wanted to show some of the home screen interactions and API demos from the SDK that take advantage of the new animation framework. The sound track has nothing whatsoever to do with Android, but the video seemed to want audio. It was a sound decision.
Wednesday, February 16, 2011
Flex 4 Fun: The International Tour
The international book tour for Flex 4 Fun began last November in Antwerp, Belgium (the home of diamonds, chocolate, and GUI toolkit programming books). It was a gray a rainy day, which is unusual for Antwerp except for the months between September and June.
The tour began as all such things do: parties dripping with scantily-clad programming celebrities, mobs of teeming fans fighting for autographs and shreds of clothing, and all-night hacking orgies. It was unforgettable, it was a blur of over-caffeinated memory, it was ... just another book tour.
The tour came to an abrupt end. I can't confirm that it was because of overcrowded venues and rabid crowds that overwhelmed Interpol forces. I can only say that I had to leave the town anonymously, quickly, and with only 10 pounds of chocolate as a memory of the experience.
Or...
I gave a talk on Flex 4 Fun at Devoxx. The presentation gave an overview of some of the graphics and animation features in Flex 4, and worked through an example of skinning a component to show some of these new features. This was one of several talks I gave that week, although this was the only one on Flex. In fact, it's probably the last such talk, since I don't have a lot of opportunity to do Flex development in my new Androidal life. Call it my final Flex fling ... 4 fun.
Instead of embedding the video, I'll encourage you to go to Parleys.com to watch the presentation, and to check out the many other videos from the Devoxx conference. Parleys has a subscription model (79 Euros to watch all videos from Devoxx 2010), but there are a few talks available for free now (like this one) to whet your appetite.
Enjoy the video while I continue to recover from the tour.
Saturday, January 15, 2011
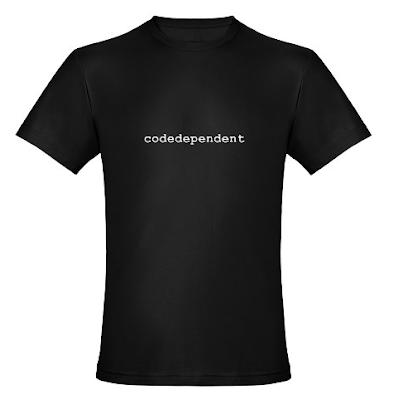
CodeDependent: The Clothing Line
(Cross-post with my humor blog; I figured this content would wear well on my geek blog, too).
For no good reason at all, I decided that geeks need more T-shirts and that I need to provide them. Fortunately, I don't have to pit my sewing skills against such a high goal; I'll just let CafePress do it for me.
Here's the first such effort, especially topical for this blog, "codedependent" (available in various colors/styles - see the site for the full array):
Tuesday, January 4, 2011
Video: Reflections on Android
Everyone's supposed to make a resolution on New Years, so here's mine: post more articles/blogs/videos about Android development. Starting with today's video tutorial.
Here's the first in what I hope will be a series of video tutorials on anything ranging from graphics to animation and back to graphics (hey, it's my show and I might as well talk about the things I enjoy).
For the Devoxx conference last November, I developed a simple picture-viewing application to demonstrate various facets of UI development that Romain Guy and I were talking about that week. You can see the presentations online at parleys.com (you'll have to register for 79 Euros to get access to them for now). But I wanted to deep dive into particular aspects of this application for my blog. Here's the first of these tutorials, in which I talk about the simple reflection effect used in the application. By the way, credit for the beautiful pictures goes to Romain, my source for all of my, er, borrowed images.
The video is in two parts (because YouTube thinks that I talk too much, so I had to split it). This first part introduces the show and talks about the effect at a high level:
Part 2 dives into the code that makes the reflection effect work:
The code in the video is a tad blurry (given the resolution of the video compared to the size of the IDE window), so here's the code from PictureView.java that I walk through for your reading pleasure (note that this code looks slightly different than that in the video due to formatting for a smaller line wrap. Also, the blurryBitmap image is now created to be only as high as the reflection height, as described in the comments):
private Bitmap getReflection(Bitmap bitmap) {
    Bitmap reflection = reflections.get(bitmap);
    if (reflection == null) {
        // We're cropping the height of the reflection to 80
        int reflectionH = 80;
        reflection = Bitmap.createBitmap(bitmap.getWidth(),
                reflectionH, Bitmap.Config.ARGB_8888);

        Bitmap blurryBitmap = Bitmap.createBitmap(bitmap, 0,
                bitmap.getHeight() - reflectionH,
                bitmap.getWidth(), reflectionH);
        // cheap and easy scaling algorithm; down-scale it, then
        // upscale it. The filtering during the scale operations
        // will blur the resulting image
        blurryBitmap = Bitmap.createScaledBitmap(
                Bitmap.createScaledBitmap(
                        blurryBitmap,blurryBitmap.getWidth() / 2,
                        blurryBitmap.getHeight() / 2, true),
                blurryBitmap.getWidth(), blurryBitmap.getHeight(), true);
        // This shader will hold a cropped, inverted,
        // blurry version of the original image
        BitmapShader bitmapShader = new BitmapShader(blurryBitmap,
                TileMode.CLAMP, TileMode.CLAMP);
        Matrix invertMatrix = new Matrix();
        invertMatrix.setScale(1f, -1f);
        invertMatrix.preTranslate(0, -reflectionH);
        bitmapShader.setLocalMatrix(invertMatrix);

        // This shader holds an alpha gradient
        Shader alphaGradient = new LinearGradient(0, 0, 0, reflectionH,
                0x80ffffff, 0x00000000, TileMode.CLAMP);

        // This shader combines the previous two, resulting in a
        // blurred, fading reflection
        ComposeShader compositor = new ComposeShader(bitmapShader,
                alphaGradient, PorterDuff.Mode.DST_IN);

        Paint reflectionPaint = new Paint();
        reflectionPaint.setShader(compositor);

        // Draw the reflection into the bitmap that we will return
        Canvas canvas = new Canvas(reflection);
        canvas.drawRect(0, 0, reflection.getWidth(),
                reflection.getHeight(), reflectionPaint);
    }
    return reflection;
}
And finally, here's the Eclipse project complete with source code, images, and everything you need to build and run the application. The app is targeted at Android 2.2 (Froyo) (and probably could work on earlier versions as well), so you should be able to run it on the emulator or any appropriate device. Note that it's just a demo and not really a full-featured photo viewer; it was written to demonstrate particular effects and techniques, not to be a real application.
Now that my New Year's resolution is fulfilled, I should go back to working on Android framework code...
Subscribe to:
Posts (Atom)